Showstopper patterned paper flowers!
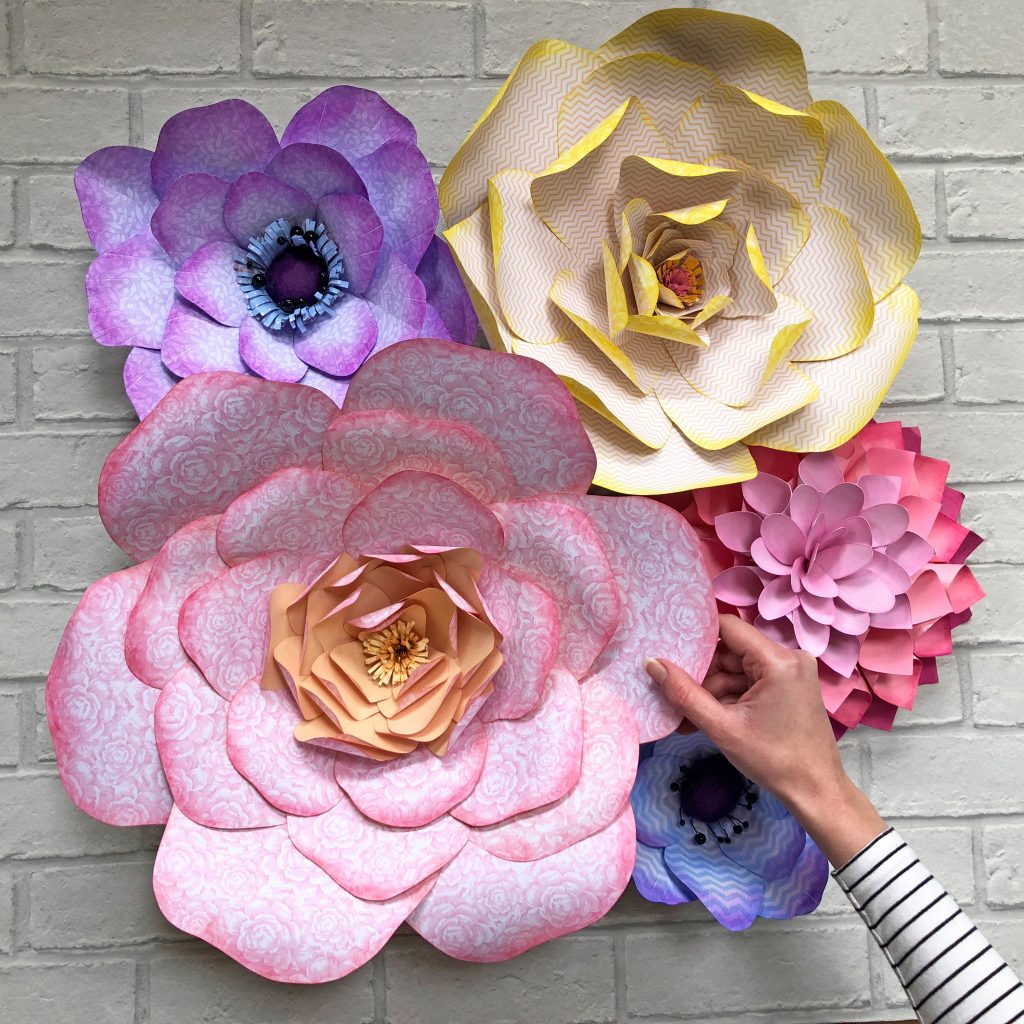
There’s nothing subtle about these beauties! I made them to decorate our stand at a recent show. I designed them to grab people’s attention – and they certainly did! In fact, they attracted SO much attention that we even persuaded Rich to do a live flower-making demo during a live TV show!
Anyway, due to popular demand, I thought I’d better share my flower-making secrets with you all . . .
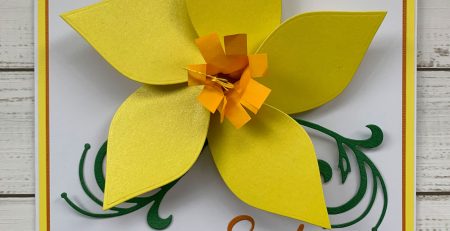
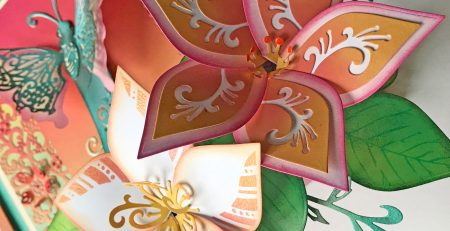
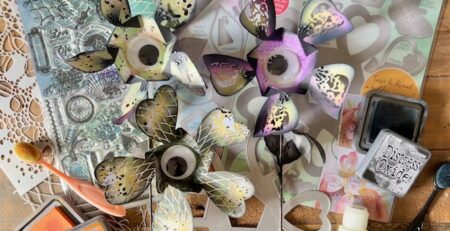
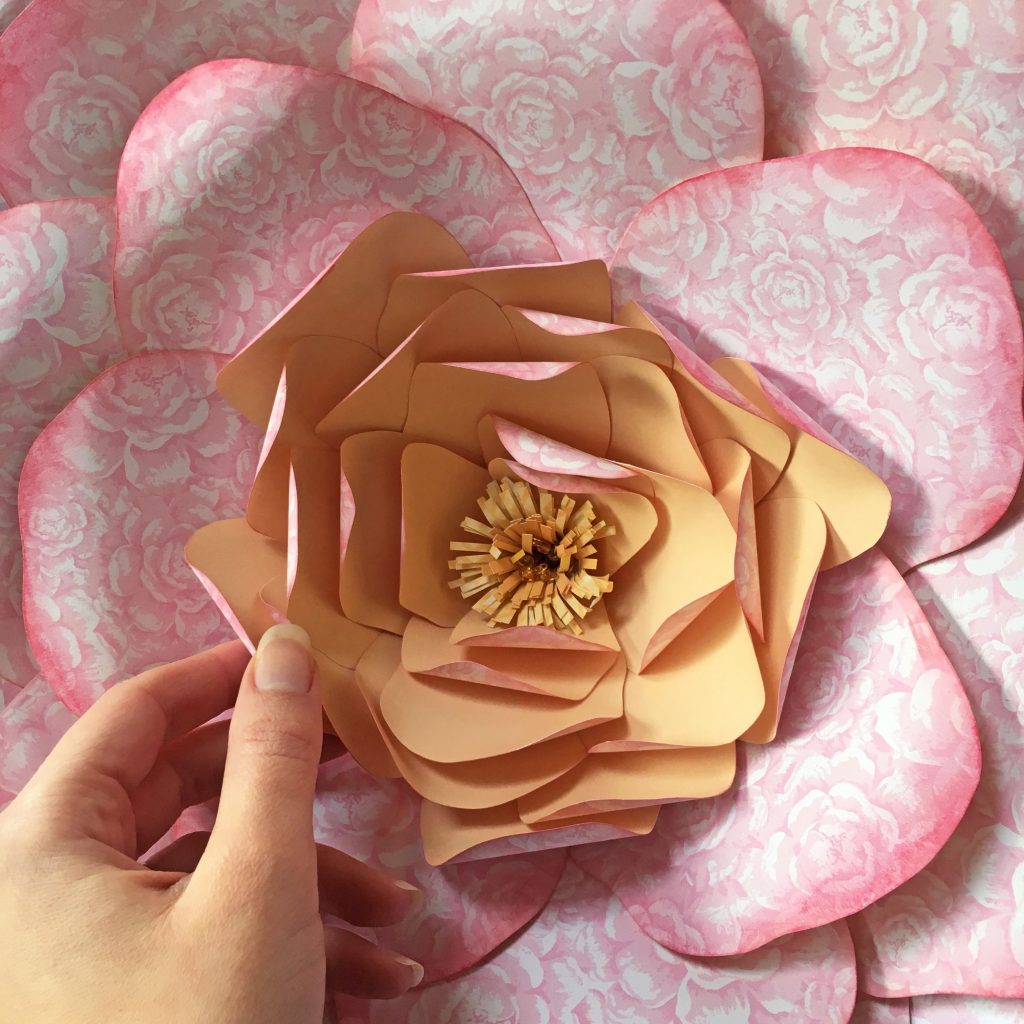
Part of the reason these flowers are so eye-catching is because of the sheer size of them! The petals were printed using plain and patterned papers from our amazing Buds to Blooms Digital Download. I printed double-sided sheets of card with different patterns – and there are a lot of patterns to choose from! I love how you get a glimpse of a contrasting pattern when the petals are curled.
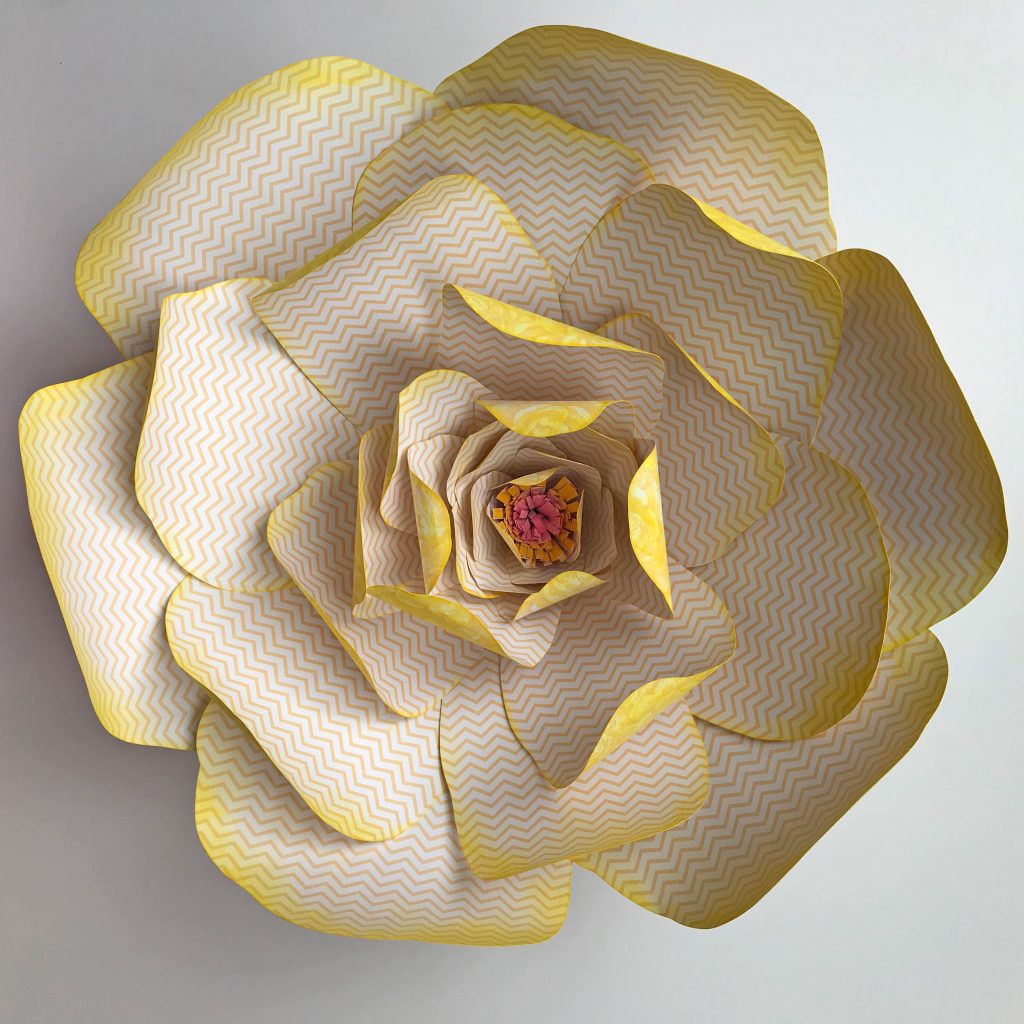
As an added bonus, Katie has put together a FREE download which includes my templates for making a large flower like the yellow peony, shown above. If you scale up the larger petals, they’ll work for the giant pink peony too!
If you print both sides of your card first and then print the templates directly onto the card, you won’t need to draw out the petal shapes yourself. However, if you are drawing around each template, then you’ll be able to best maximise the number of petals you can cut from a single sheet of card.
If the card isn’t too thick (and you’re not using the printed template technique), then you can probably cut multiple petals in one go, which would save time. The petals don’t need to be exact. Flowers are different in nature so irregular petals will blend right in!
Here are a few steps for how to make your own bold and beautiful paper flowers:
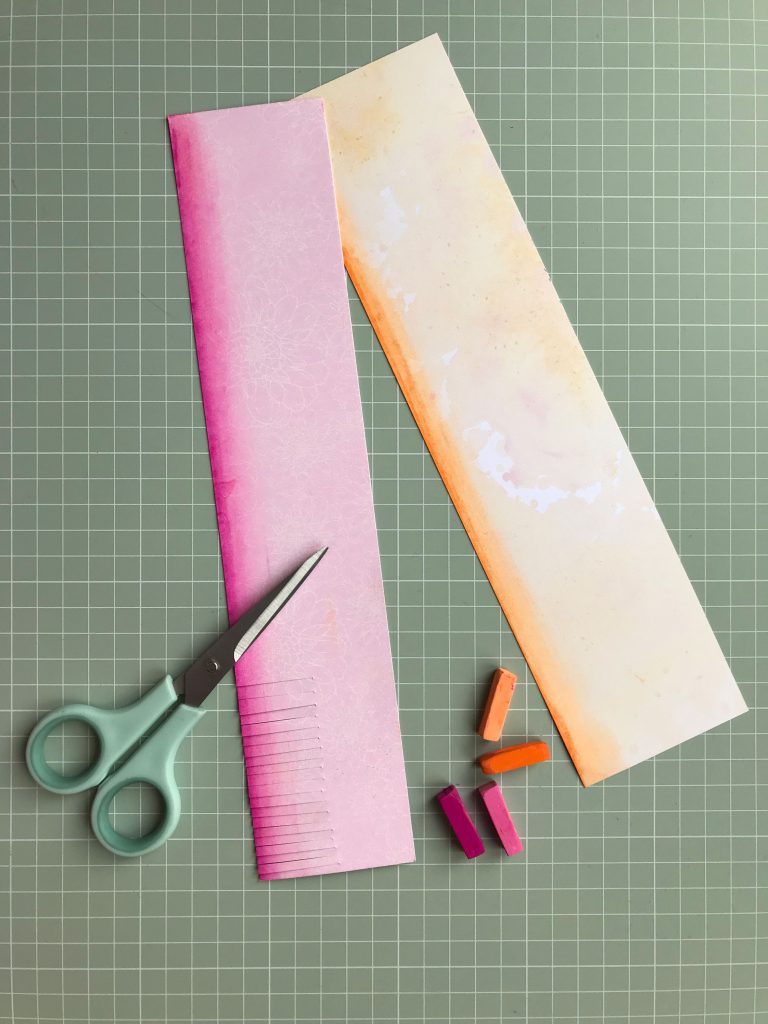
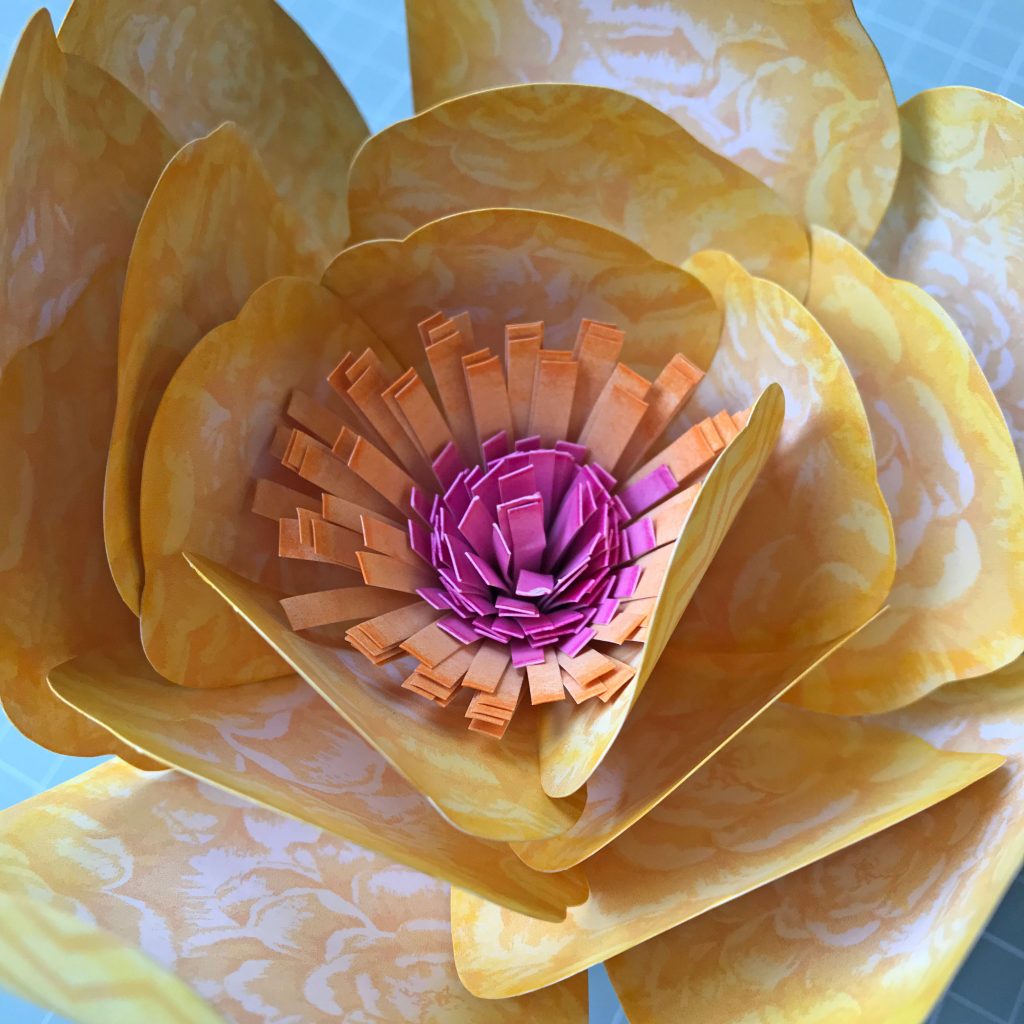
I started by cutting two strips of paper across the width of a sheet of A4 card (21cm long). The pink strip is 6cm wide and the orange strip is 7cm wide. The card is printed, and I used pastel chalks to brighten the colour along one edge. I then snipped a fringe along the chalked edge, cutting about half way across the width each time.
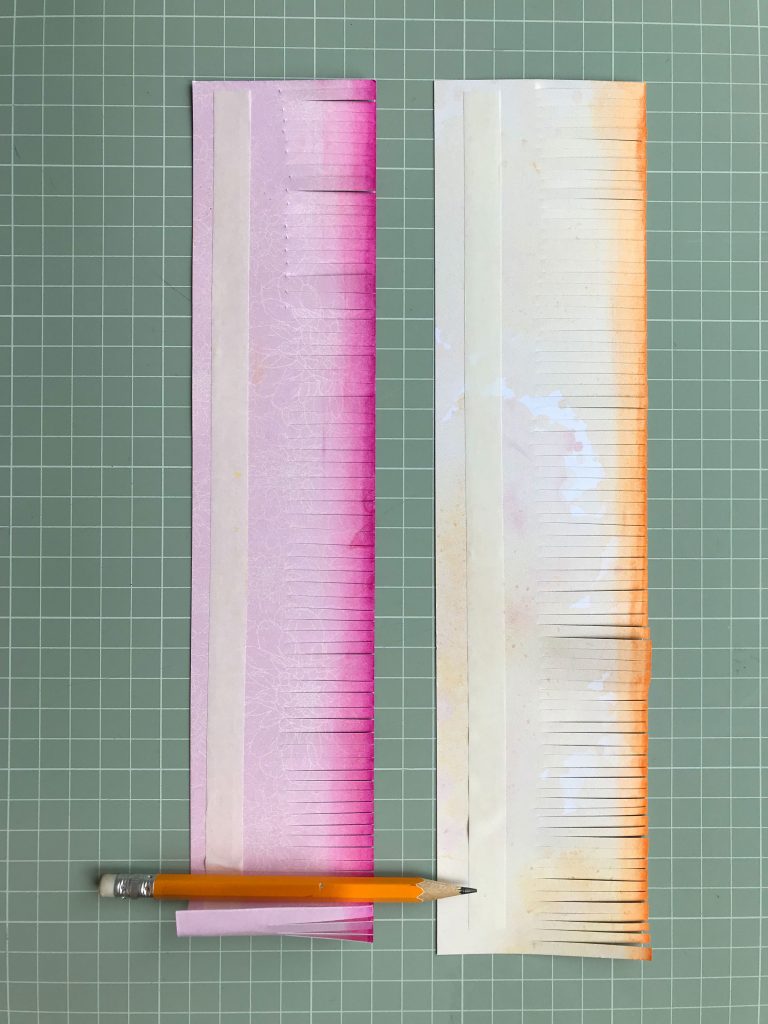
I attached a length of double-sided tape along the straight edges of each of the paper strips and then rolled the narrow strip around a pencil to curl it. The backing of the double-sided tape was then removed and I rolled the pink fringed strip into a coil. The orange fringed strip can then be wrapped around the first coil. Together they form the centre of your flower and you can fan out the coiled paper fringes to create a pretty effect. If you keep the straight edges roughly lined up as they coil around, it will help your flower to stand up and have a flat base.
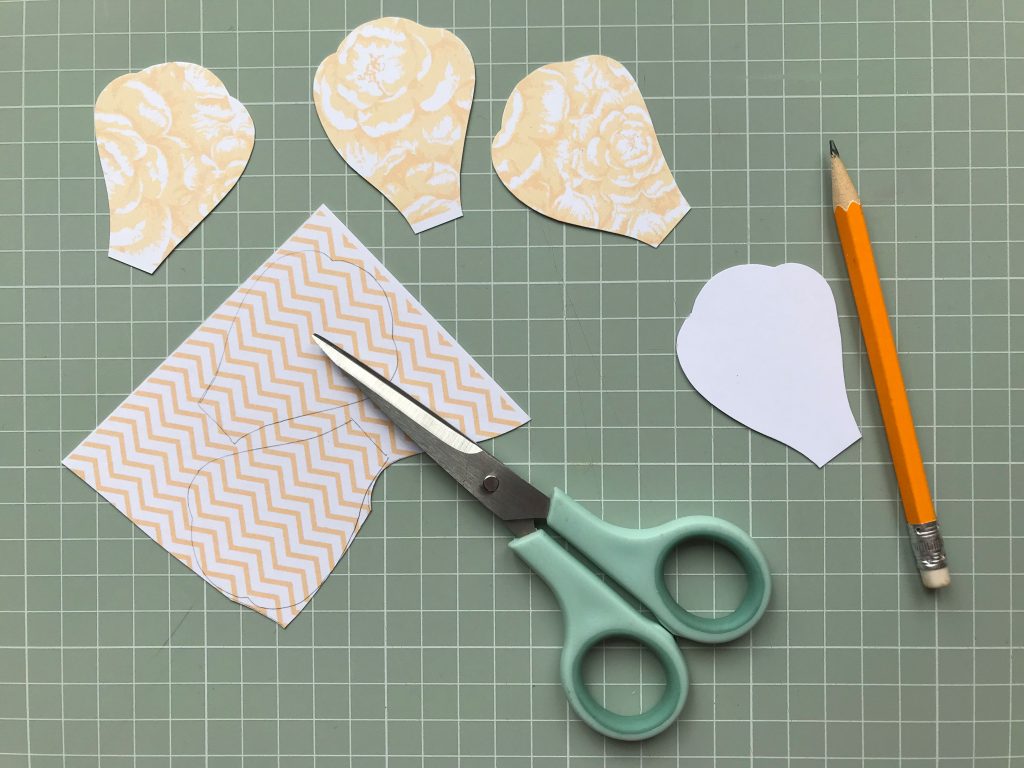
Cutting out the petals by hand is fairly straightforward – and don’t worry if they’re not cut perfectly. By the time the edges are chalked/inked and curled, it’s unlikely that anyone would notice! You’ll need around 6 petals of each of the 6 petal sizes from the free download template.
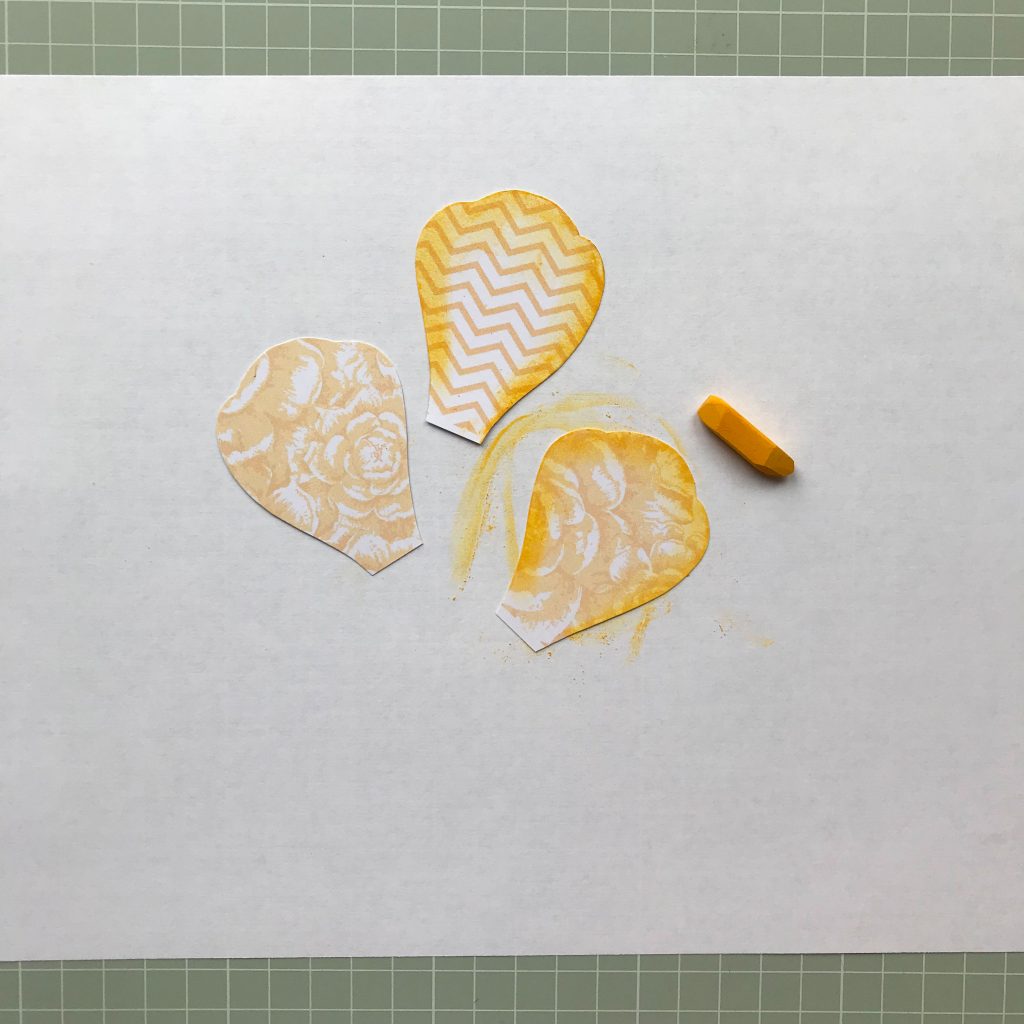
I’ve used pastel chalks to add shading to my flower petals. This was simply because I didn’t have the right shade of ink pads and, if I’m completely honest, it’s because I needed to make several flowers in a hurry! If you have the time, then these petals would look great coloured using a blending tool and ink pads.

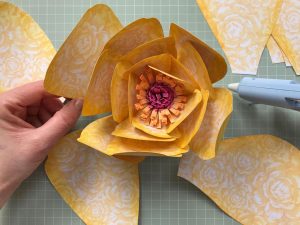
Once you’ve made the coiled, fringed centre of the flower and cut out the petals, you can then start building up the flower. I curled each of the smaller petals slightly with my fingers first. I grouped the larger petals together and rolled them around a small rolling pin to curl them – but you could use something similar you have at home instead.
Starting with the smallest petals, I applied a generous blob of hot glue to the base of each petal before positioning it around the flower base. I find this technique helps to quickly and easily build up the flower. I overlapped and staggered the petals slightly for a natural look.
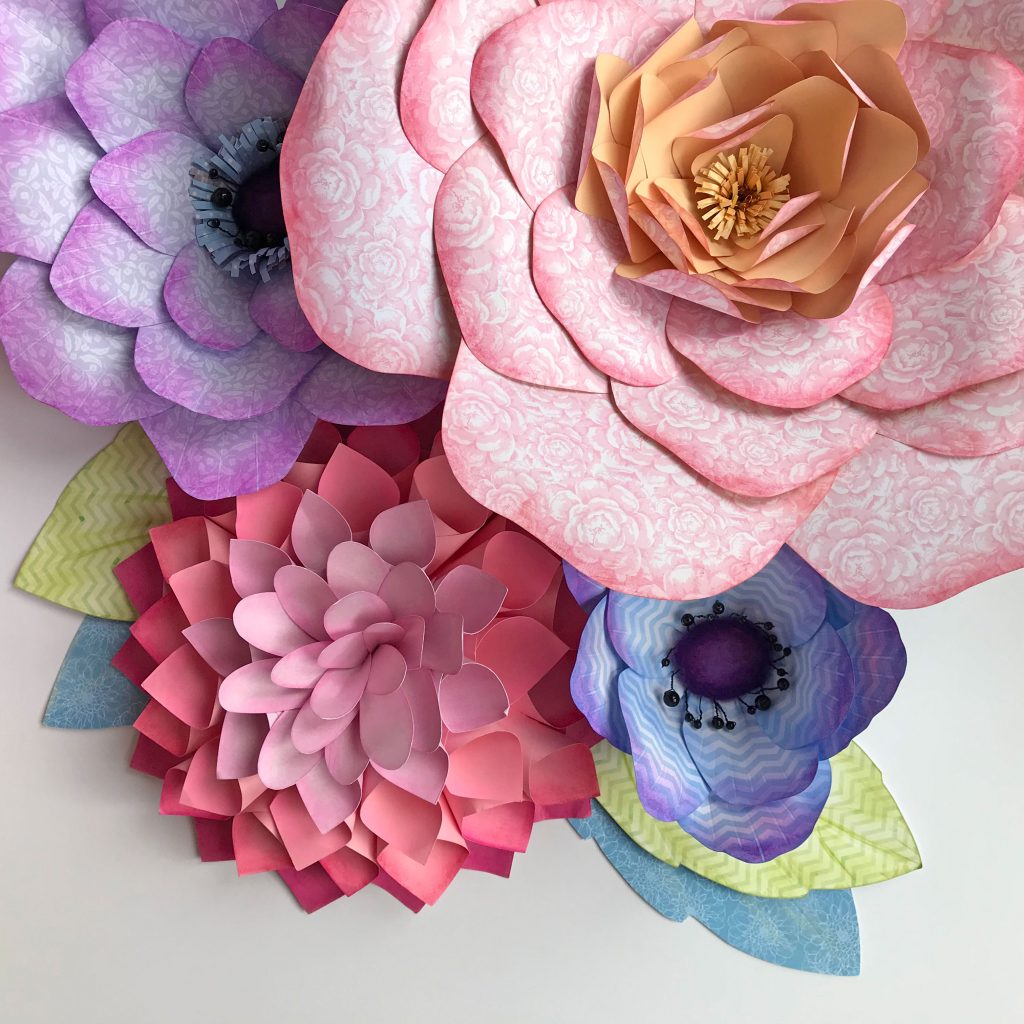
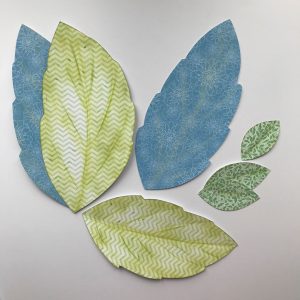
Part of the fun of making these paper flowers is that you can get carried away attaching bigger and bigger petals! The pink peony shown below is huge! By adapting the shape of the petals you can vary the look for different types of flowers. As part of our display, I used the papers from the Buds to Blooms Digital Download to print some patterns for decorative leaves. I was really pleased with how the light green leaves looked positioned over the darker blue pattern.
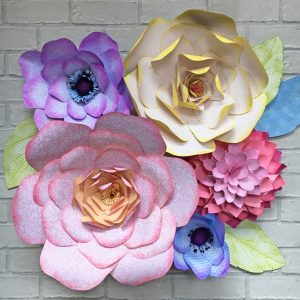
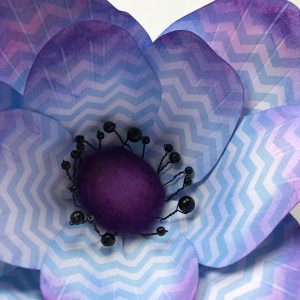
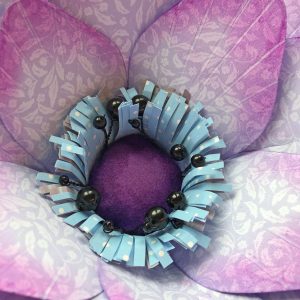
I don’t want to overlook the anemones from this display because I absolutely love how they turned out! The centres are made from a piece of purple felt that I wrapped around a couple of cotton wool balls and secured with a few stitches at the back. I had a broken necklace with black plastic beads and I threaded a bead onto each end of a length of dark blue craft wire. I made a few more stitches at the back of the felt to attach the beaded wire lengths. The anemone shown below right, has a paper fringe that was wrapped around the felt centre and attached with a glue gun. The eagle-eyed amongst you will notice a bit of shading around the felt too. That was something I did once the flowers were complete and I simply used a dark purple alcohol marker to colour the felt.
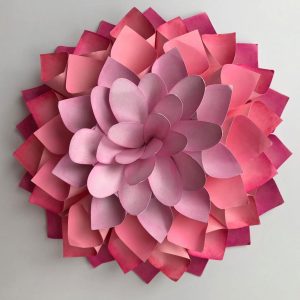
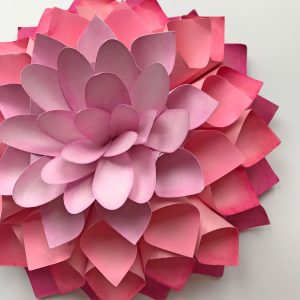
If you’re wondering about the striking pink dahlia, well it’s mostly made of different sized squares! I rolled two opposite corners of each square towards each other to make a cone shape. Each of the cones was arrange around a large mount board circle. I used a hot glue gun to attach each of the cones, starting with the largest cones around the outer edge.
I continued to build up the dahlia by adding cones from smaller and smaller squares, until only a small gap was left in the centre. Starting with a darker shade for the outer petals and switching to lighter shades as you work towards the centre is what makes this flower so eye-catching! I cut several narrow, curved petal shapes and arranged them in the centre to finish off the flower.
I hope you like these bold 3D flowers and that you’re inspired to make your own, because it’s a lot of fun!
Please stop by again for more inspiration.
Happy crafting!
Angela