Flutterings stencil technique using spray inks!
The decorative borders from our new Flutterings die sets took some time to design, mainly because they’re just so intricate, but it was totally worth it because the finished sets are absolutely stunning!
As well as using them to cut a decorative edge into an A5 card, or trimming them to make border strips, you can also use them as stencils. I wanted to share an exciting technique with you that I discovered whilst experimenting with spray inks! Of course, you can use them as stencils using a blending tool to apply stamping inks, etc. but this technique was new to me and best of all, it was surprisingly quick to do!
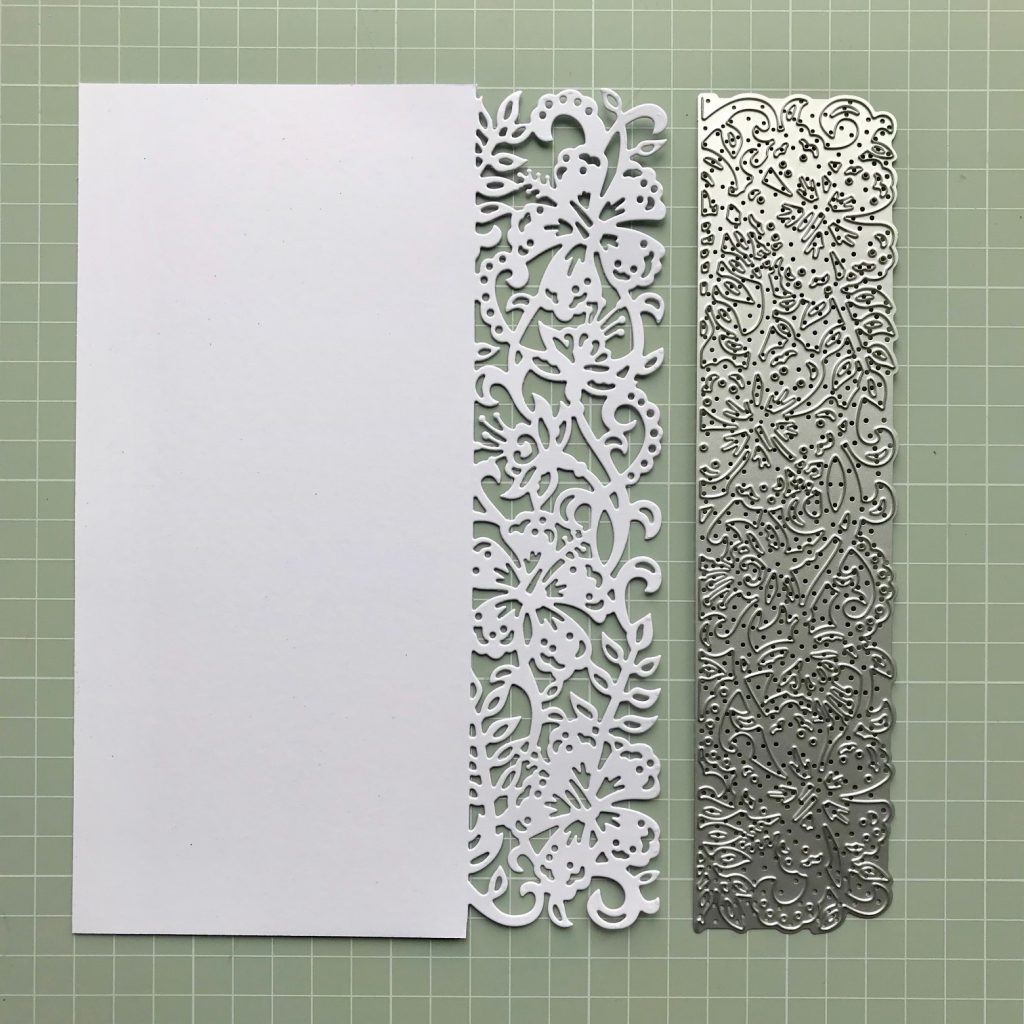
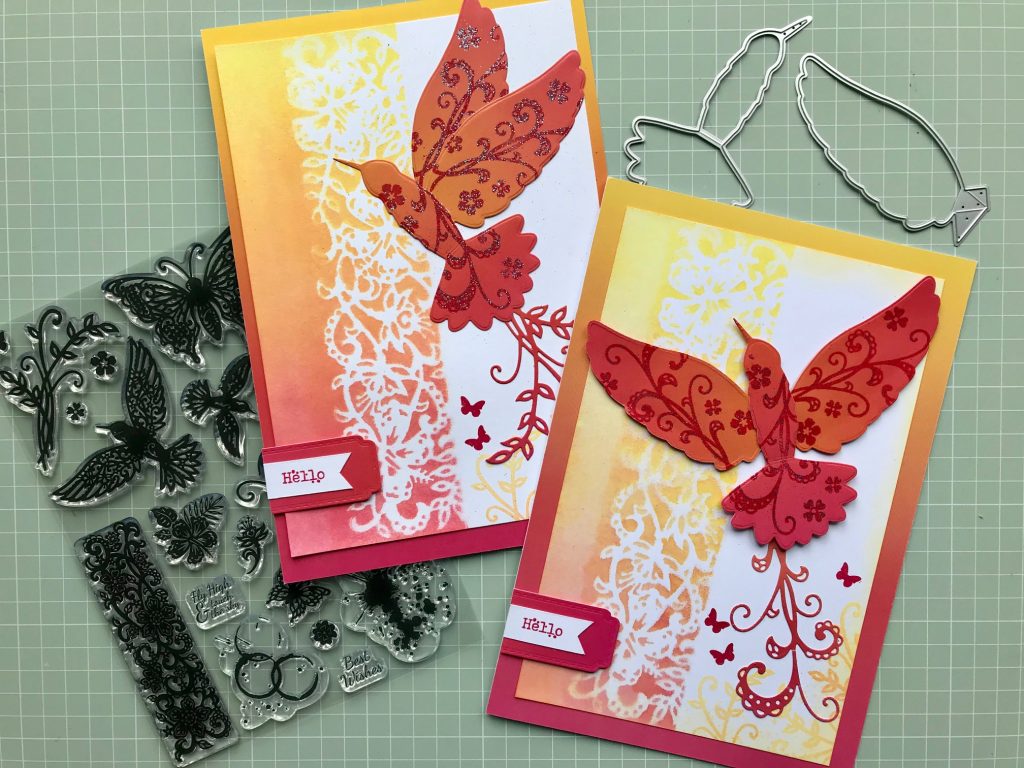
To get started, you’ll first need to die-cut a decorative edge using the border die. This will work with either the Hummingbird (shown above) or Butterfly border from the Flutterings die sets – and you can use the dies you have in your craft stash already to make stencils for this technique too. I’m always looking for ways to get the most out of my craft products, as it makes them better value!
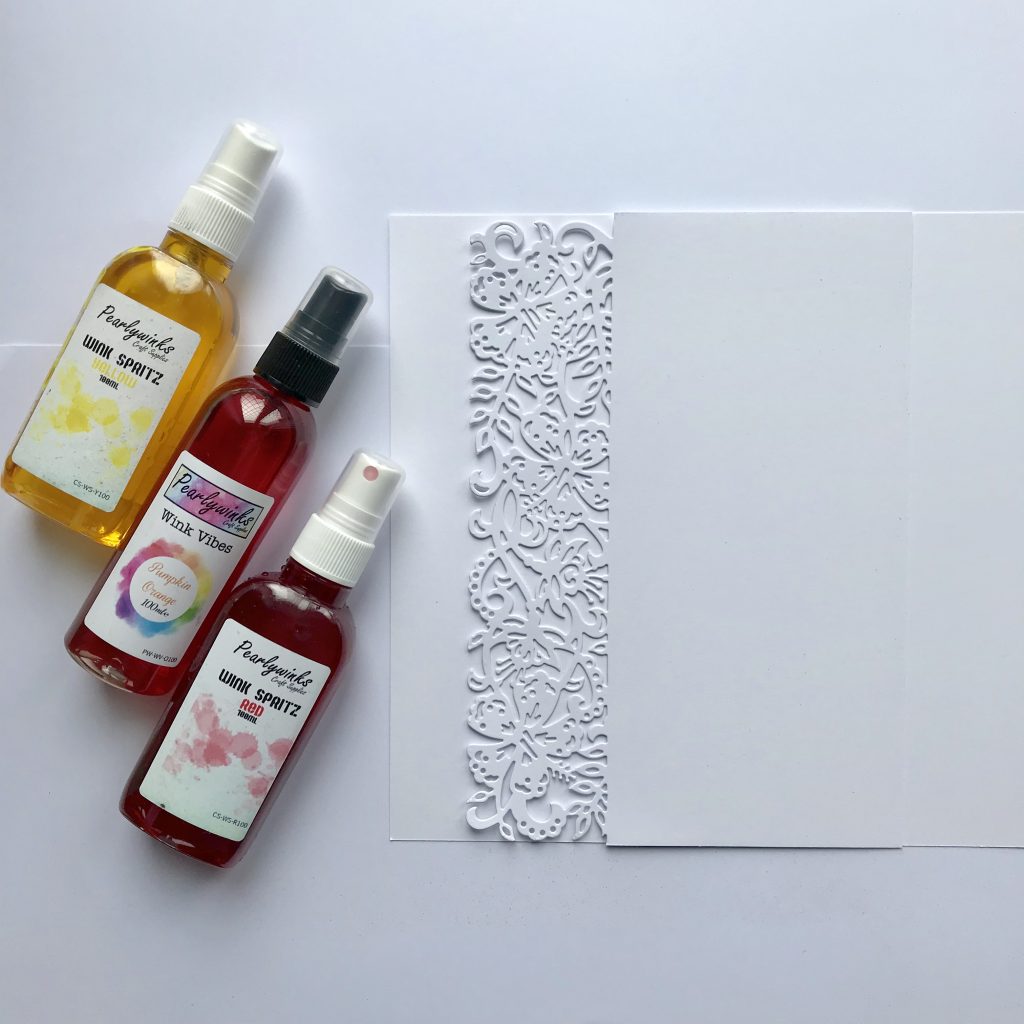
Inspired by the Tropical Mist gradients card pack, I decided to created a sunset effect using yellow, orange and red spray inks. These spray inks are from Pearlywinks and I really like that they come in a handy spray bottle. I’ve protected my craft mat with scrap paper and placed an A4 sheet of card over it. The die-cut stencil has then been positioned over the top.
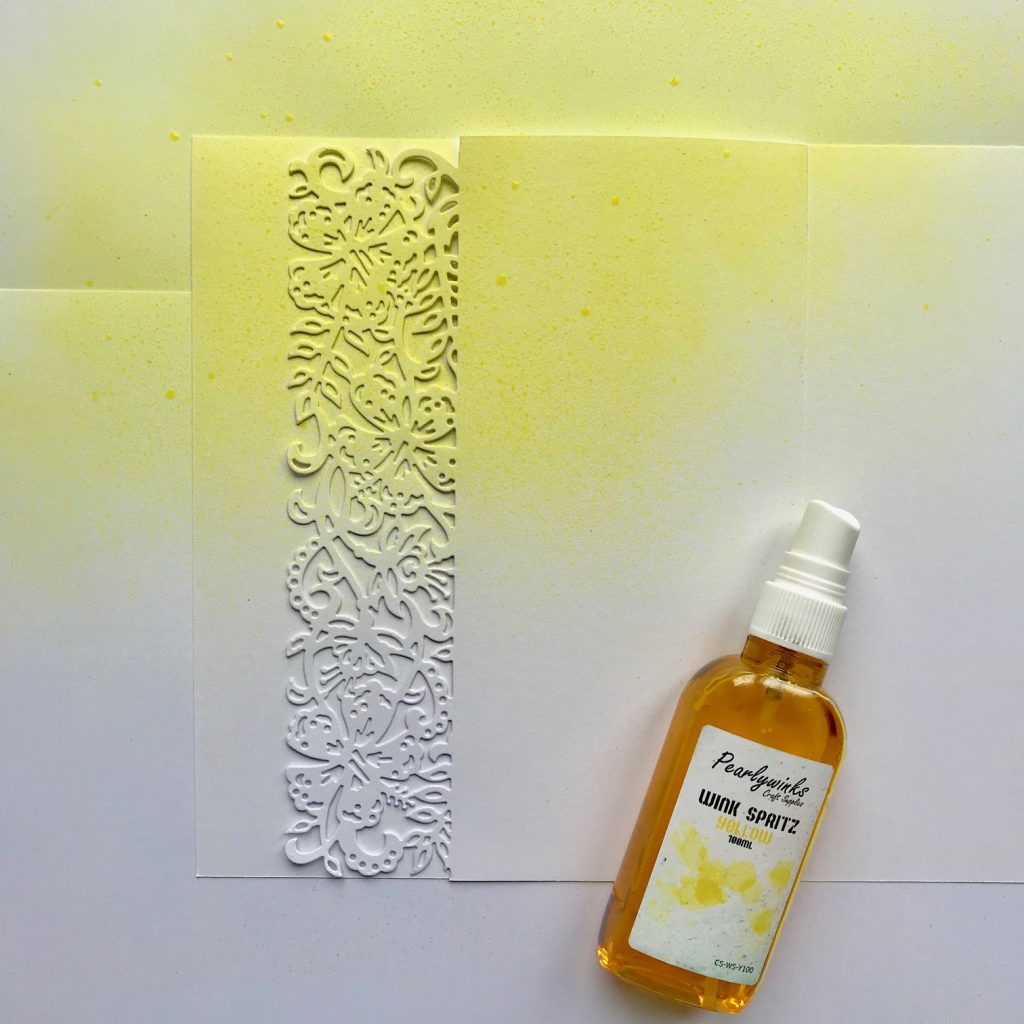
I spritzed the yellow ink across the top of the card. To achieve a blended look, spray just below about a third of the card so that the inks can overlap slightly.
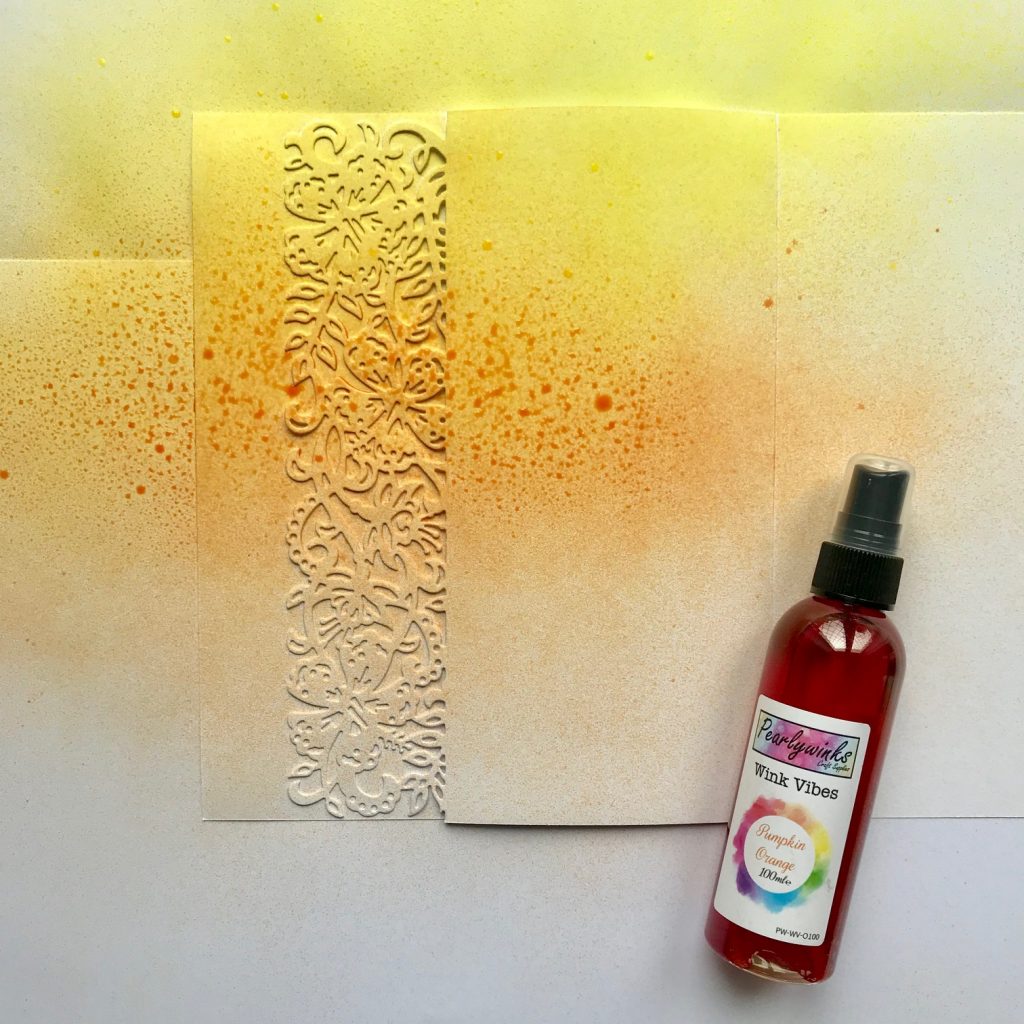
Spritz the orange spray ink across the middle of the card.
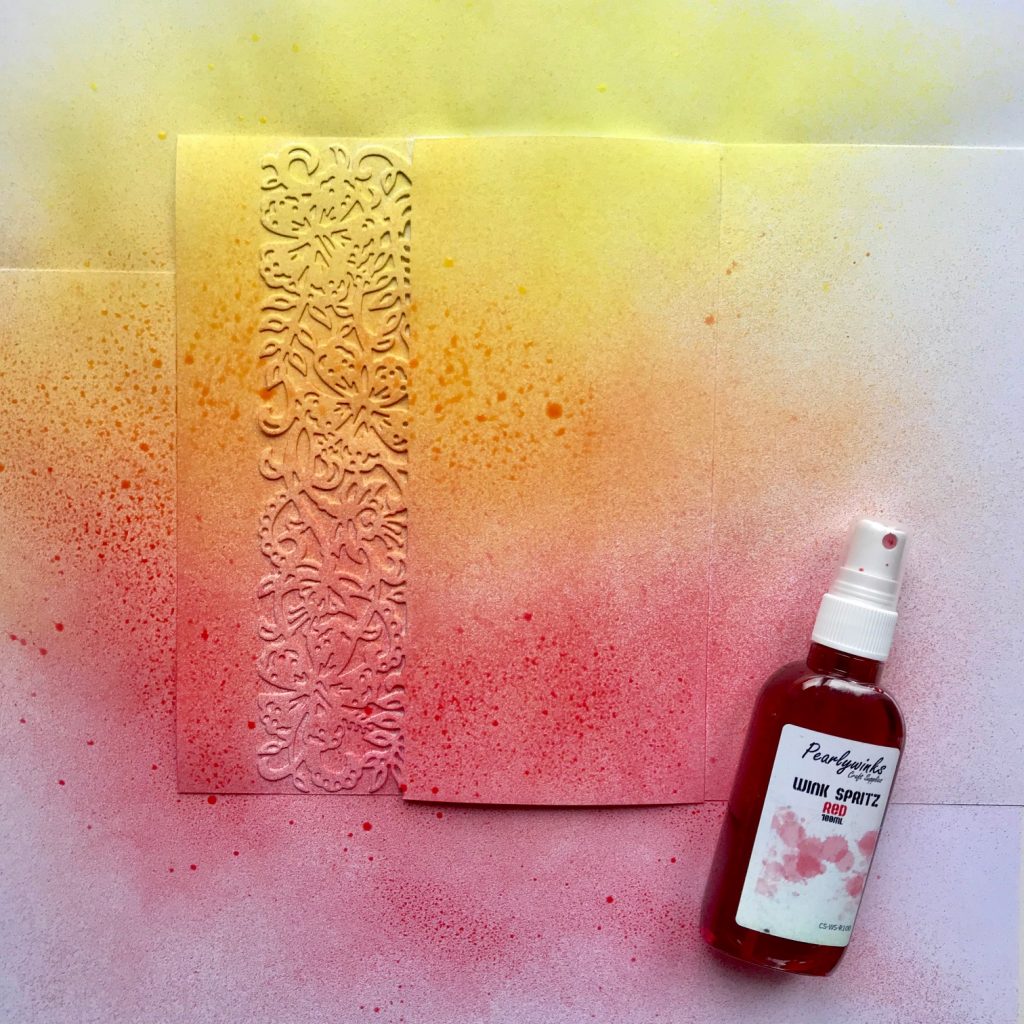
And the red ink along the bottom of the card.
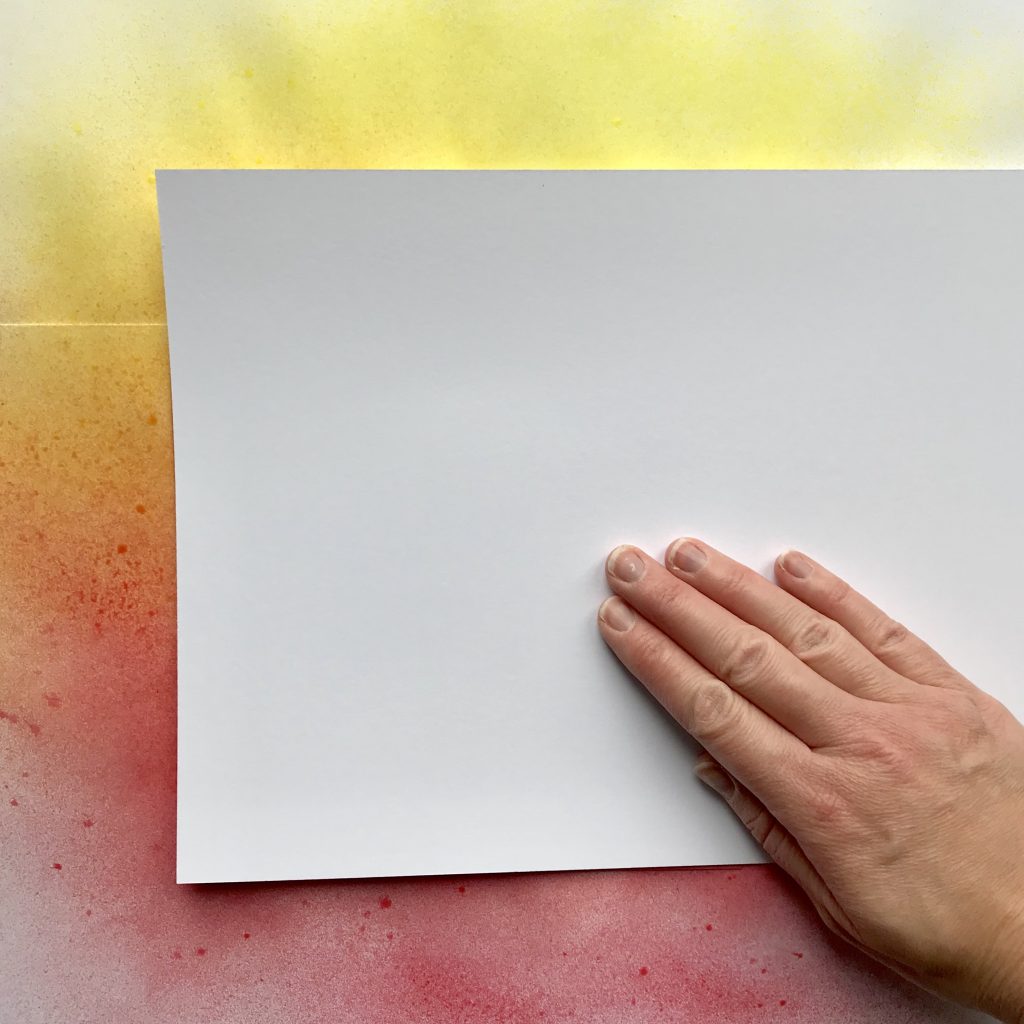
Now my top tip for this technique is to generously spray the inks over the card, and that speed is essential! Have a piece of card ready to press immediately over the top and apply a light pressure so that the card can soak up all of the surface ink. The reason you don’t want to delay applying the card over the top is because these inks dry quickly. Definitely don’t stop to take photographs like I did! I wondered why the photographed technique here didn’t work quite as well as it usually does . . . and then I realised it’s because I took my time taking photographs. So I had to repeat the process. Haha!
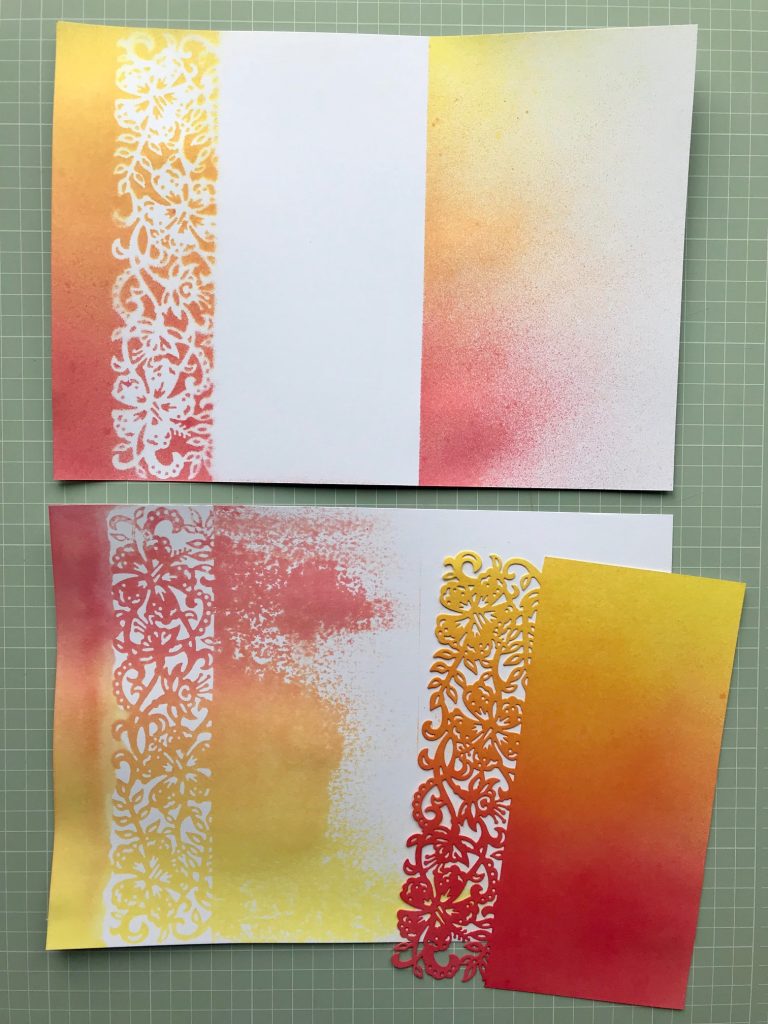
When you lift the stencil away, this is the result! You’ll have a negative impression where the stencil has acted as a mask, then the positive impression of the border from where the top sheet of card soaked up the ink, plus the original die-cut stencil which looks great too! You’ll notice there’s also an area of spray ink shown top right that I’ll definitely use for crafting – let’s face it, nothing goes to waste!
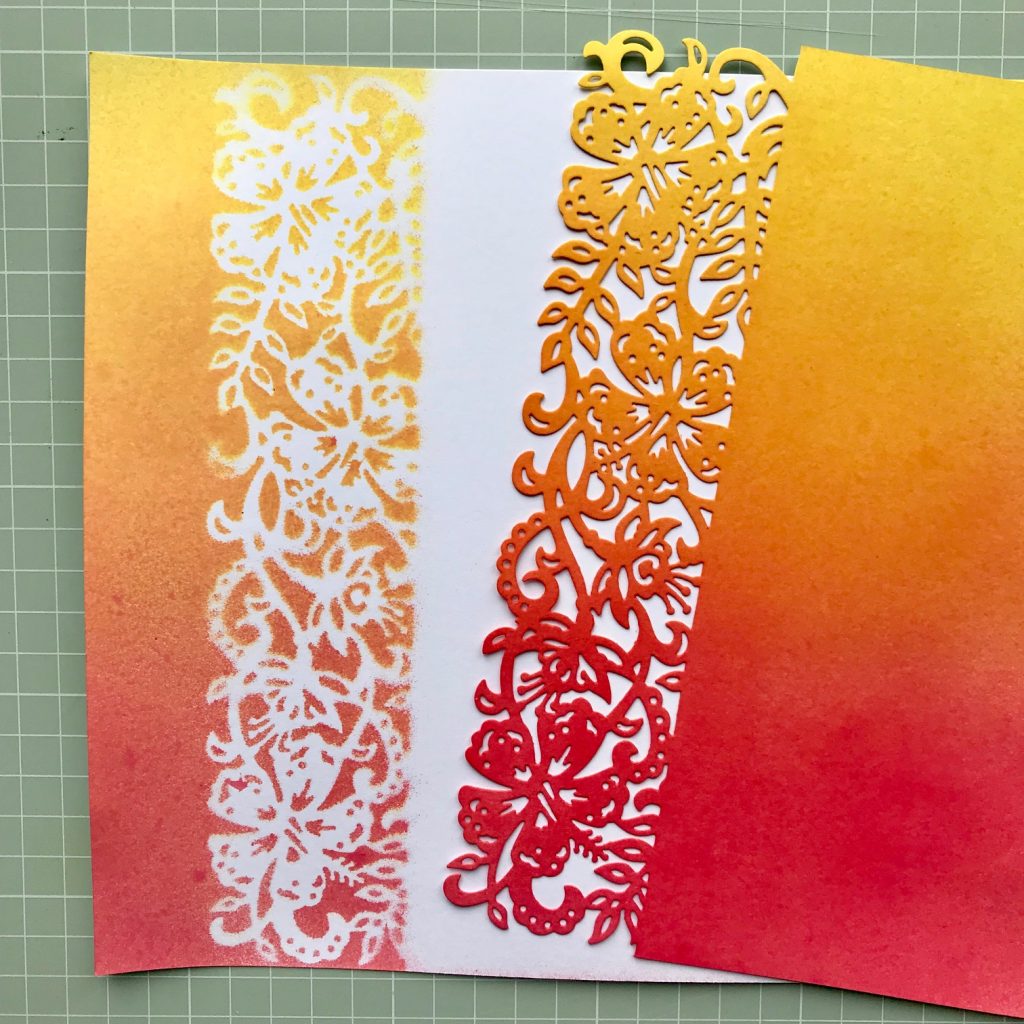
Here’s a close up of the negative border impression and the die-cut stencil.
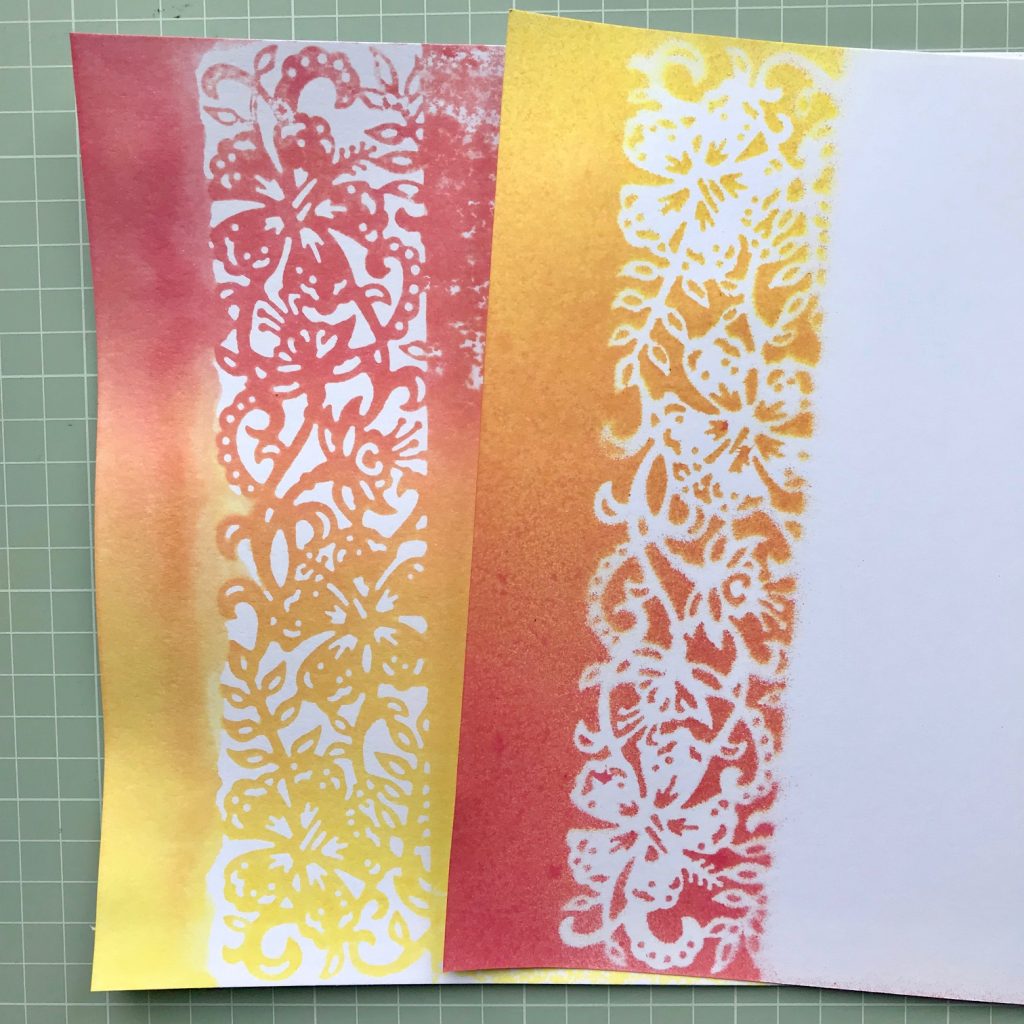
And a close up of the positive and negative border impressions. So that’s how the basic technique works! It’s quick and I love how many useable pieces the spray inks create.
To continue, this is how I used my negative border to create a finished Flutterings card design:
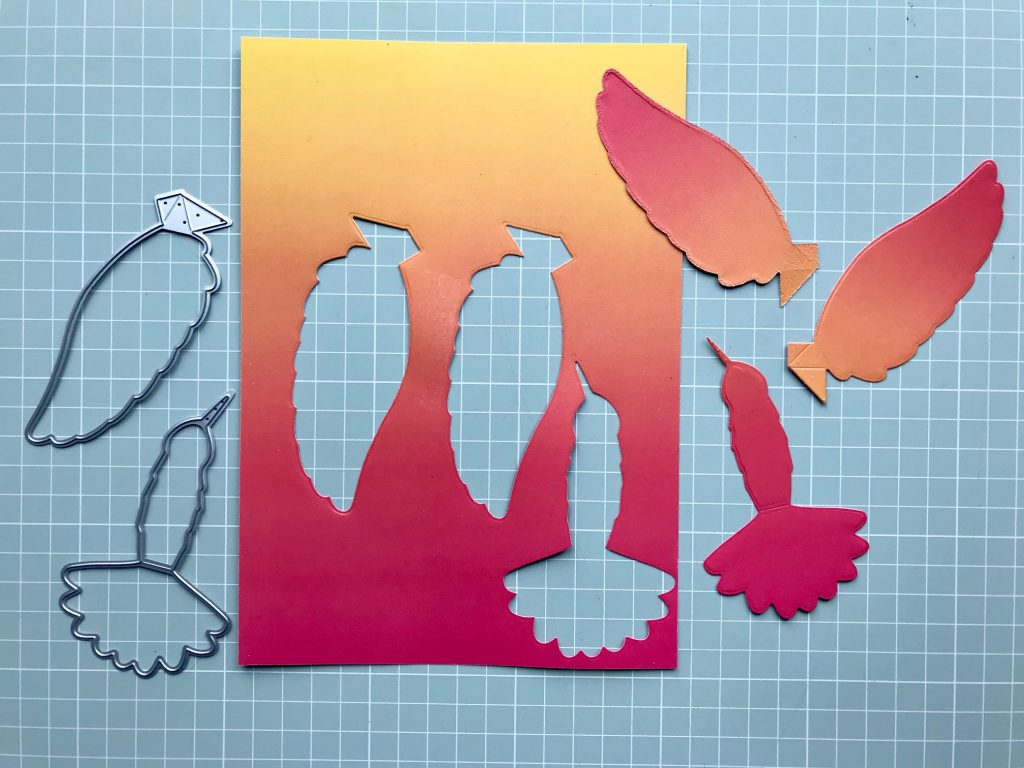
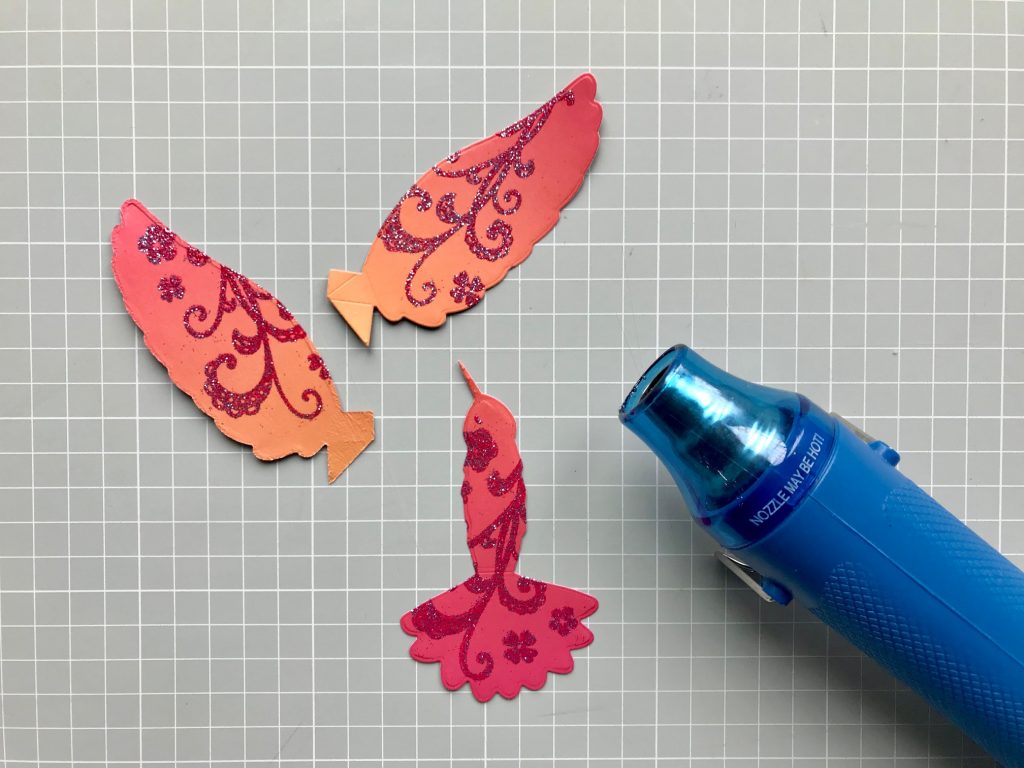
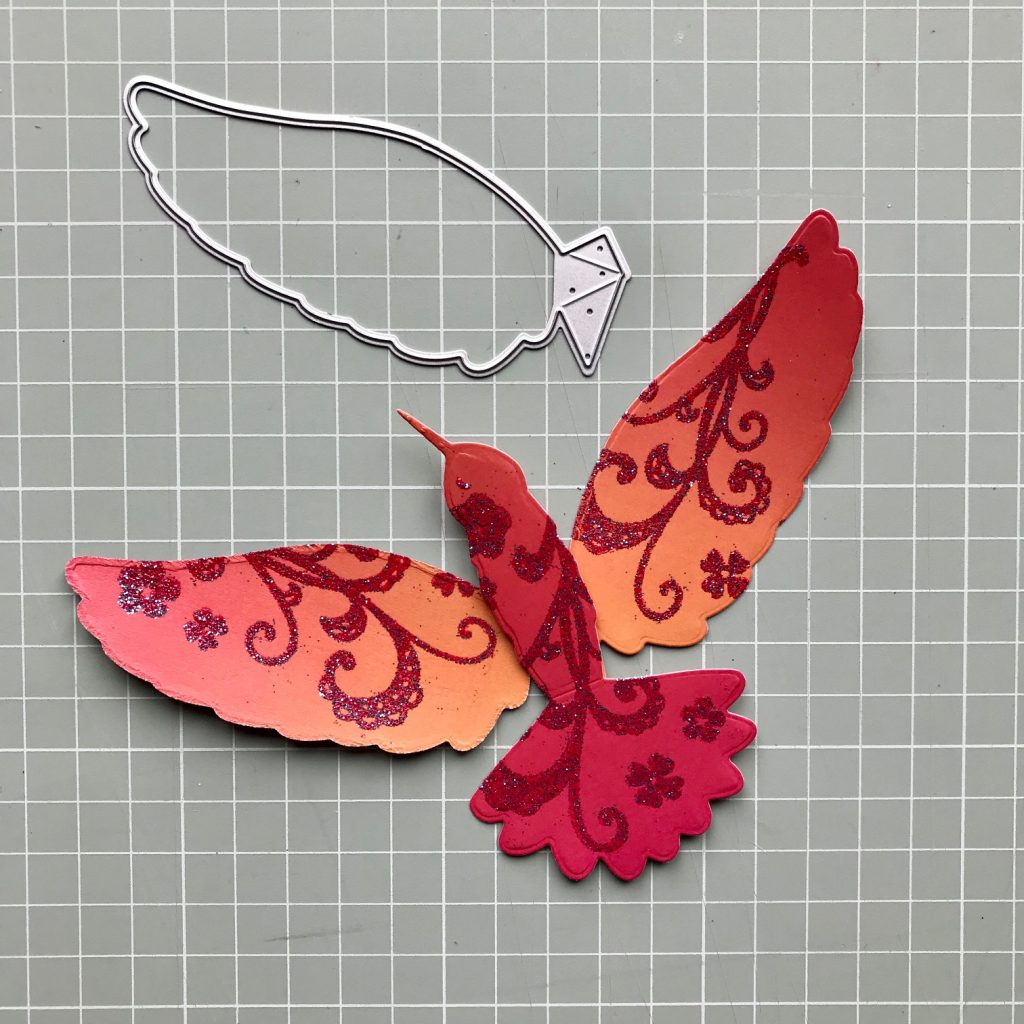
First, die-cut two plain wings and one plain body from a sheet of the Tropical Mist gradient card pack. I’m using dies from the Hummingbird set but you can use this technique with the Butterfly set too. The gradient sheets are double-sided so you can flip one wing over to face the opposite direction.
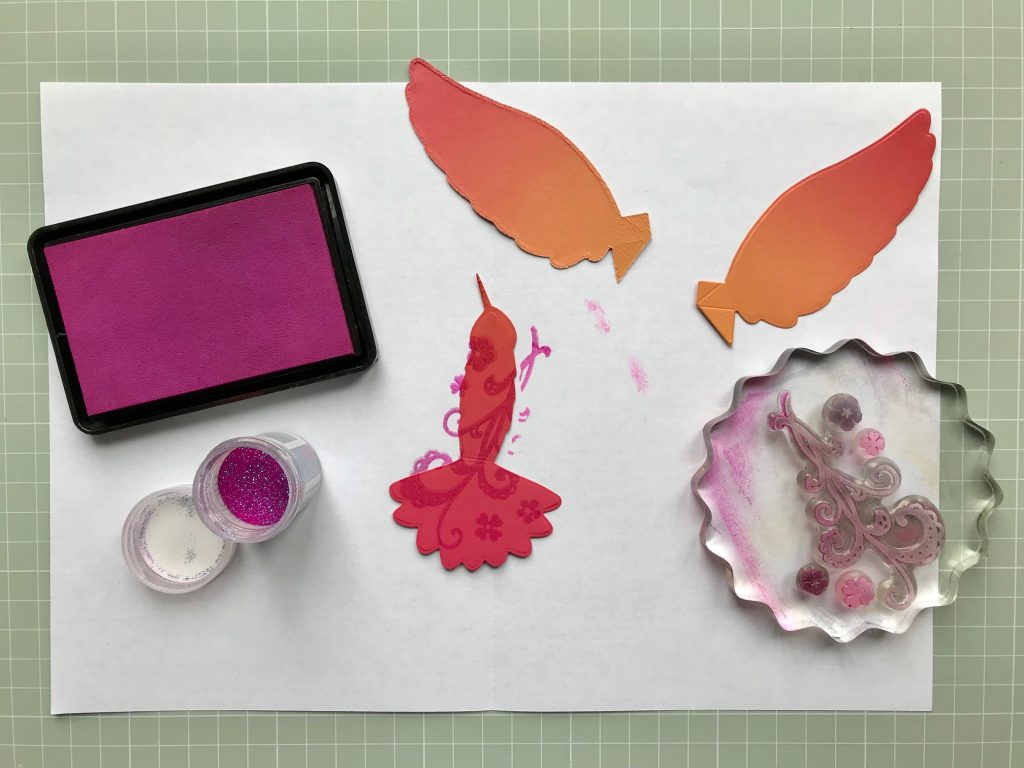
Here I’ve taken a flourish stamp and a few small flowers from the Flutterings A5 Photopolymer stamp set and arranged them on an acrylic block. I then stamped the design over the plain body of the bird using pigment ink to create the look of patterned paper.
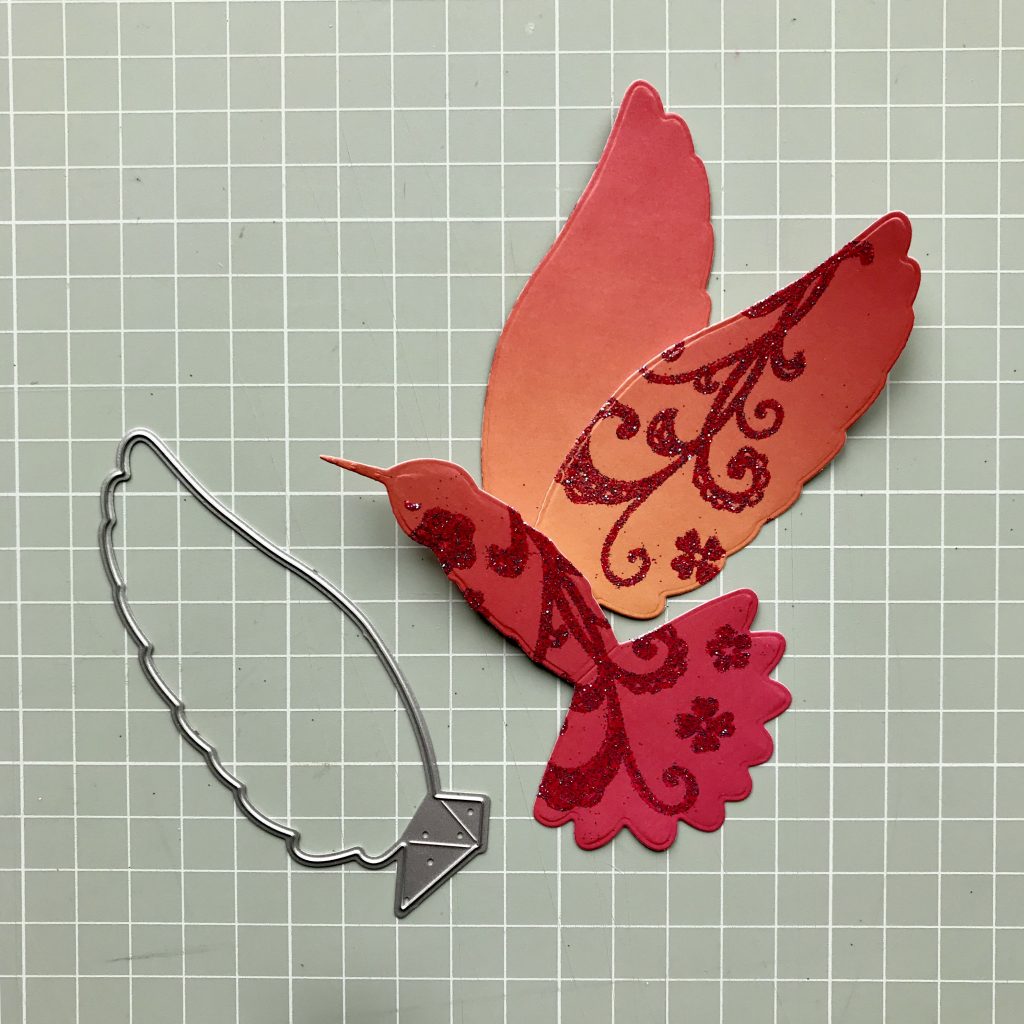
To add a bit of dimension and sparkle, I’ve sprinkled Wow! embossing powder, Raspberry Coulis over the stamped design. This is one of my favourite embossing powders as I love the combination of blue and purple sparkling particles! Pigment ink dries slowly, which means it works well with embossing powders.
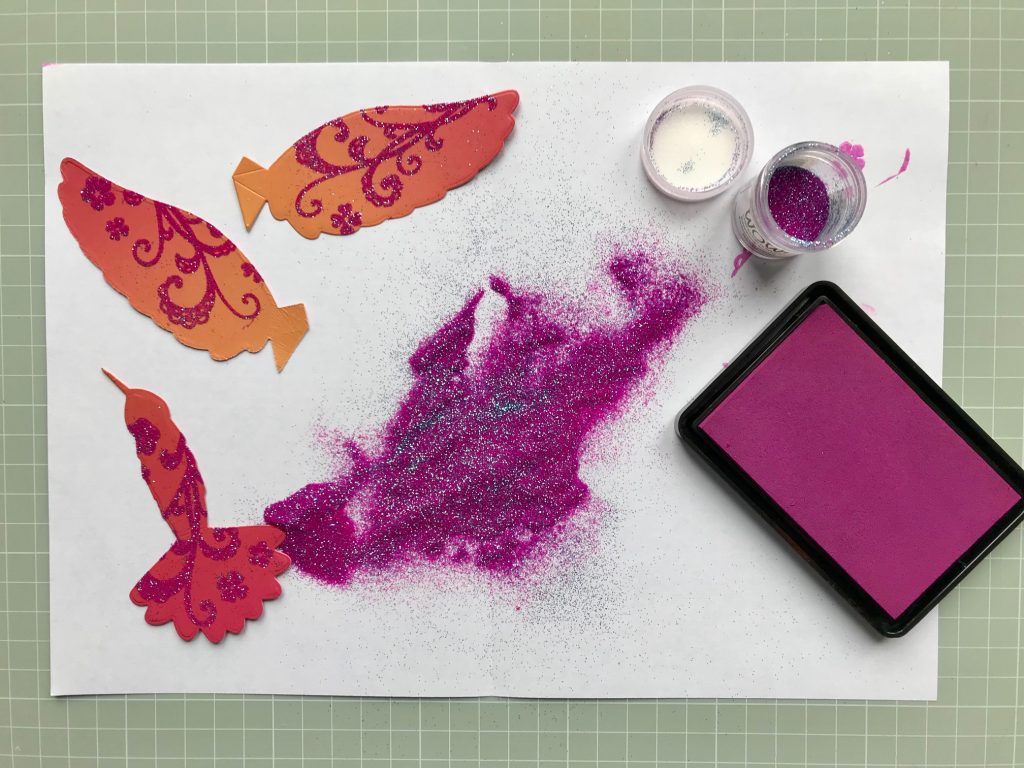
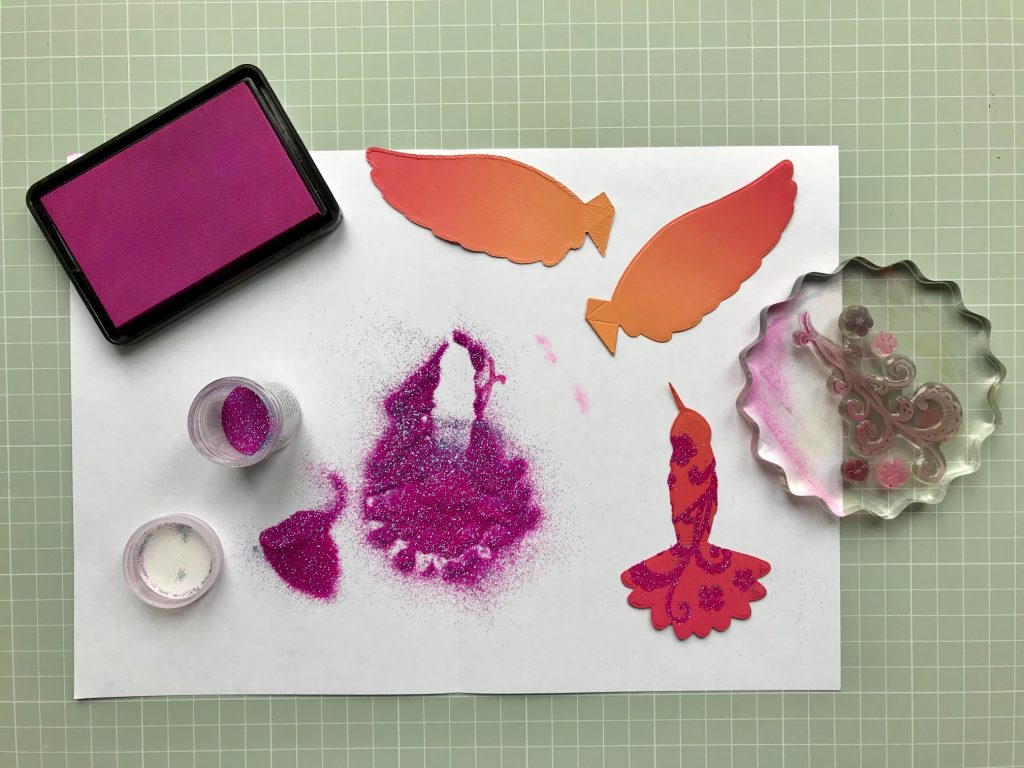
I then stamped and embossed the wings as well.
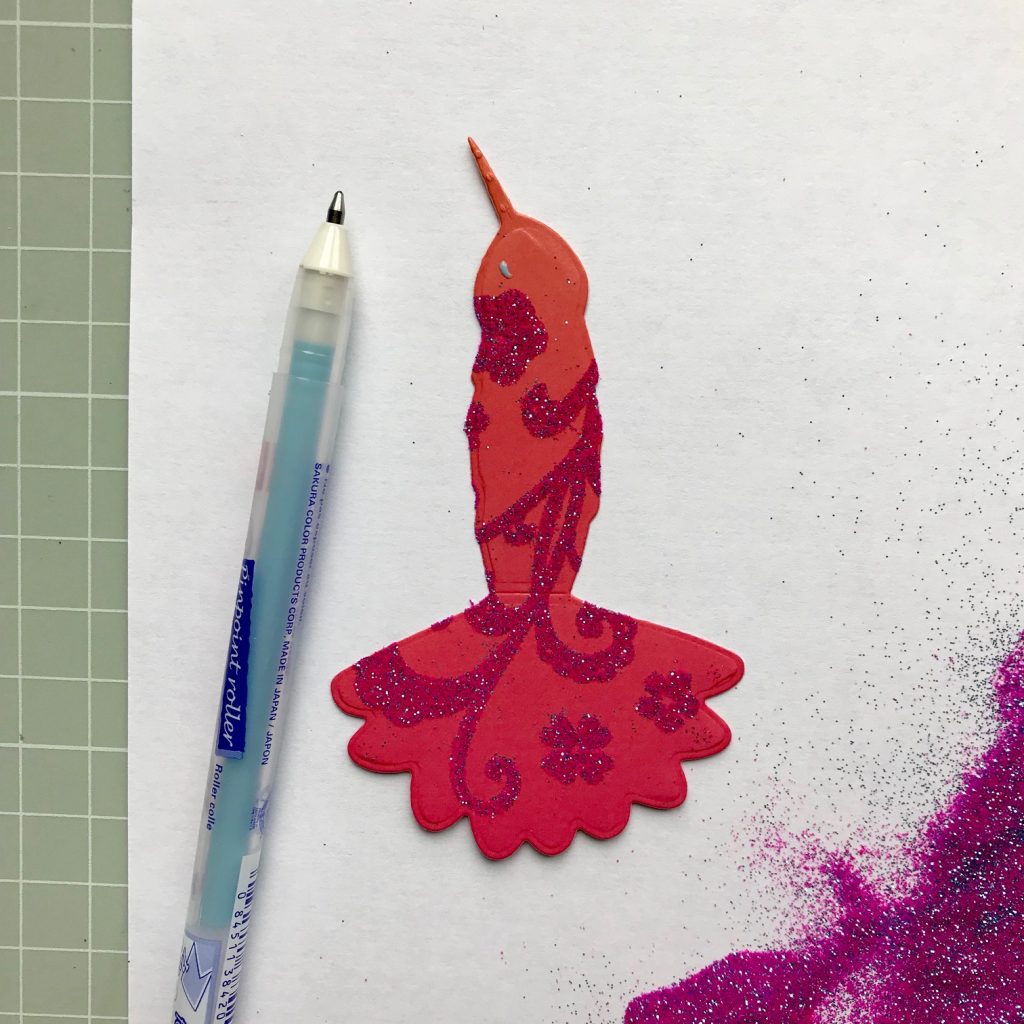
I drew a closed eye with a glue pen and sprinkled a little embossing powder over it.
The embossing powder is then heated and set using a heat gun. It’s best to move the heat gun around as you watch the embossing powder melt, so that you don’t overheat it.
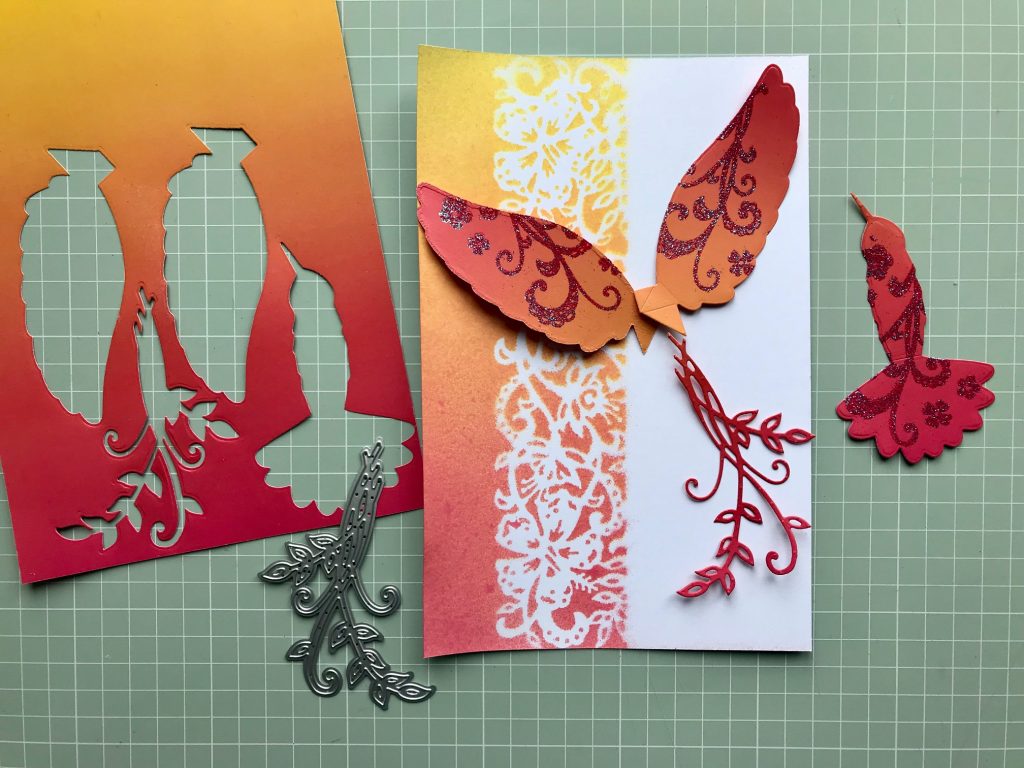
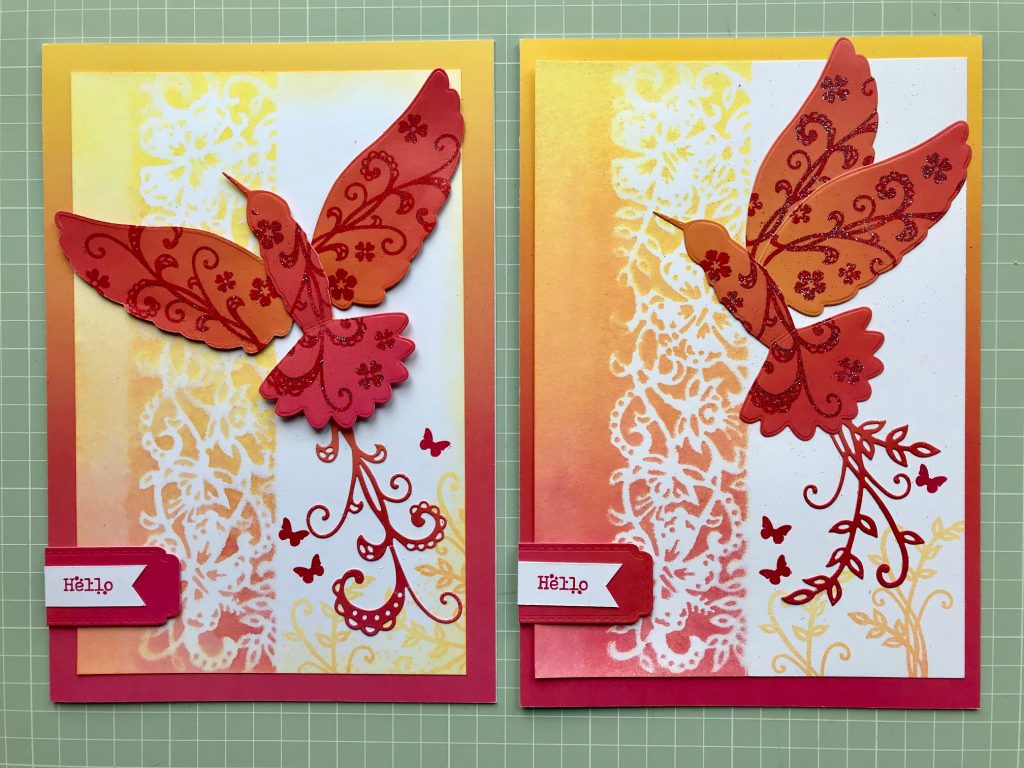
I then arranged the pieces over the panel I made using the spray inks. I’ve included a die-cut flourish as I love how they look positioned below either the hummingbird or butterfly.
This is a close up of how I’ve arranged the pieces on the card. You can see below how the wings can also be arranged if you don’t flip one of them over.
I actually forgot to flip one of my wings over during a recent show on HOCHANDA and I’m pleased that I did because I love the different look! Occasional crafting accidents like this are great. The ones where you mount a design to a card in a way that it opens backwards aren’t so great . . . we’ve all been there, right?!
I hope you enjoy trying the technique out yourself, and please stop by again for more crafting inspiration!
Happy crafting!
Angela